In this topic, you will learn, how to select a table name and Run a query.
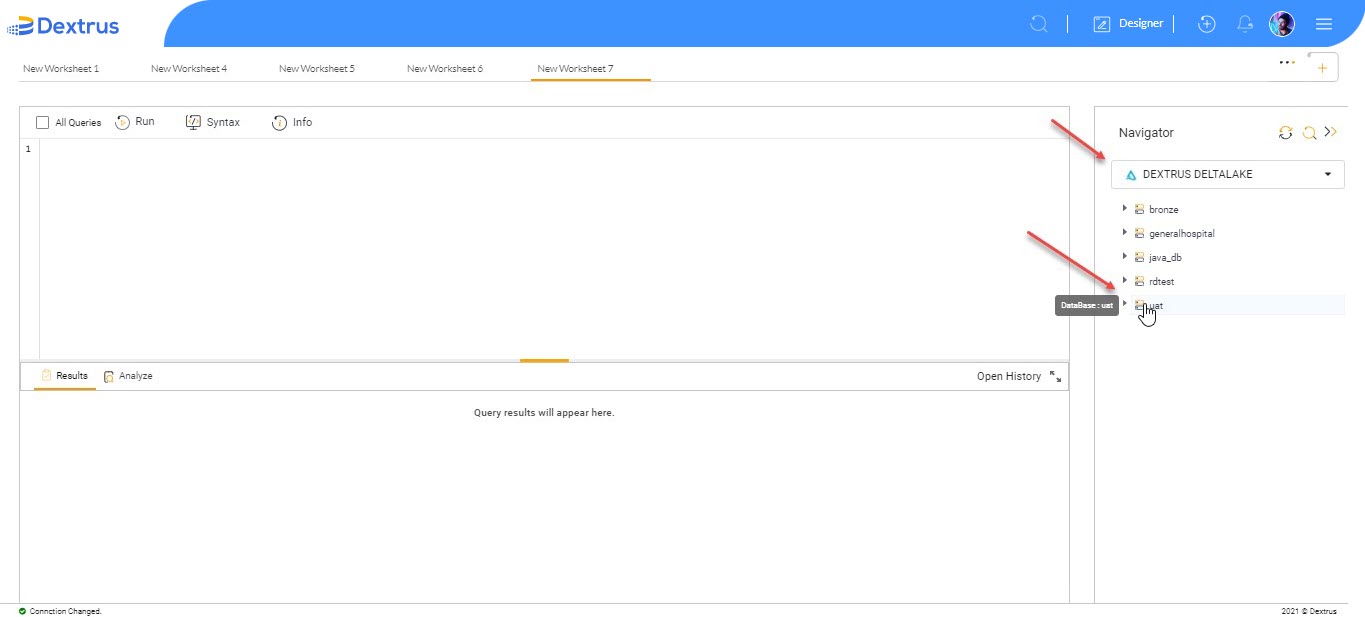
- Navigate to the right pane of the screen. Under Navigator, select the “Dextrus Deltalake” option from the drop-down list.
- Click the
 Refresh icon to refresh the “Dextrus Deltalake” data before drilling down into its details.
 - A list of all available databases is seen.
- Click the expand button icon against the “uat” database to expand the selected database tree.
- A list of all available tables is seen under the selected database “uat”.
- Once again, click
 the expand button icon against the “supplier” table to expand the selected table tree.
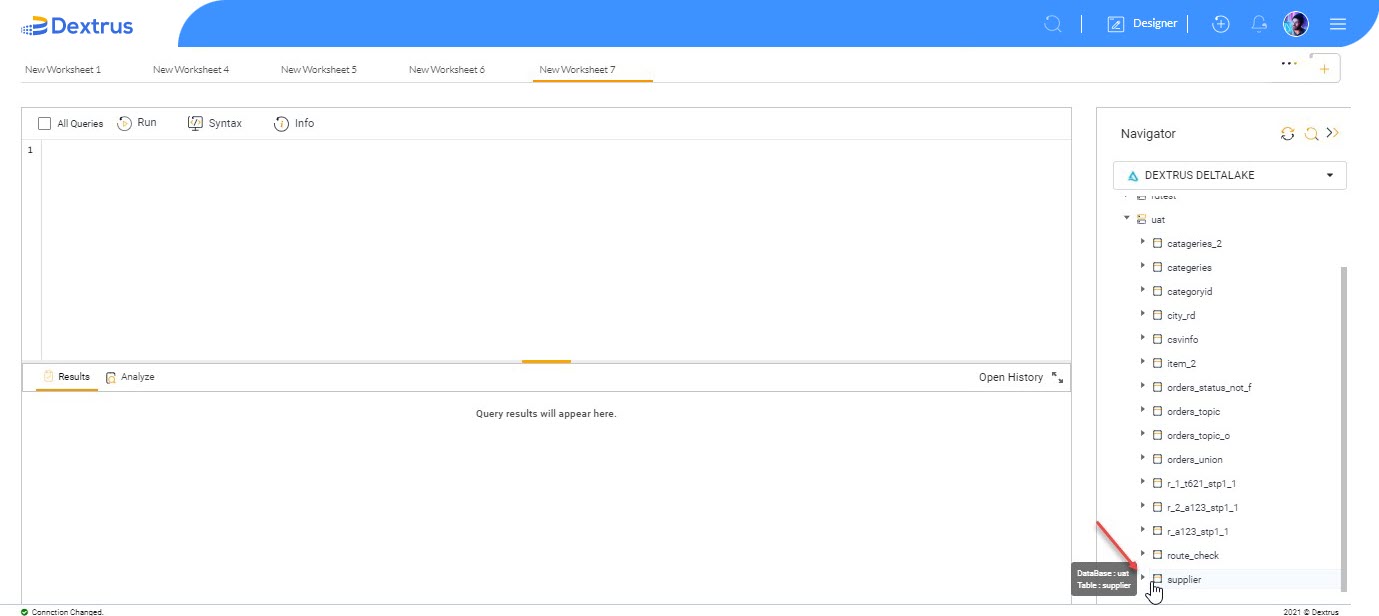
- Once you expand the table tree, a list of all available columns under the selected table “supplier” is seen.
- Drag and drop the “supplier” table onto the New Worksheet. Or else double-tap on the selected table to obtain the table name in the New Worksheet.
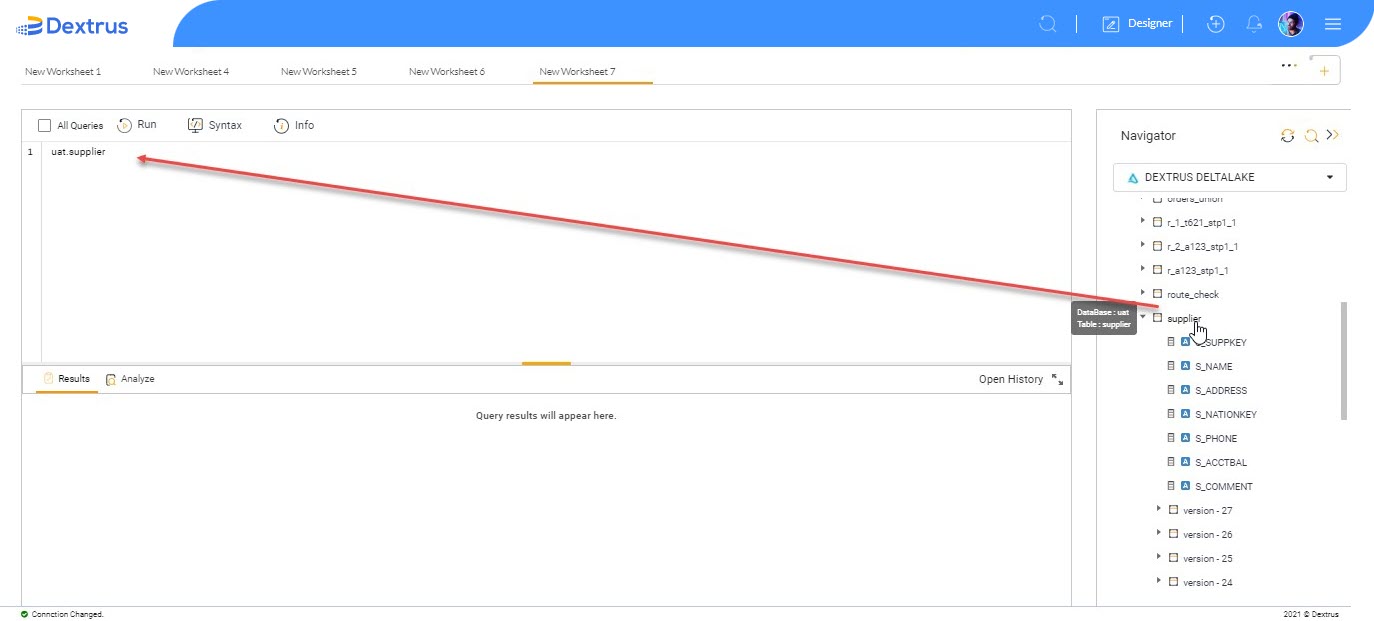
Note: You have to type the query to obtain desired results.
- Initially, we typed “Select * from” query, which is prefixed before the selected database and table i.e. “uat.supplier”.
Note: For demonstration purposes, we have considered the “Select” query. Similarly, you can type any SQL query in the DB explorer to obtain desired results as required.
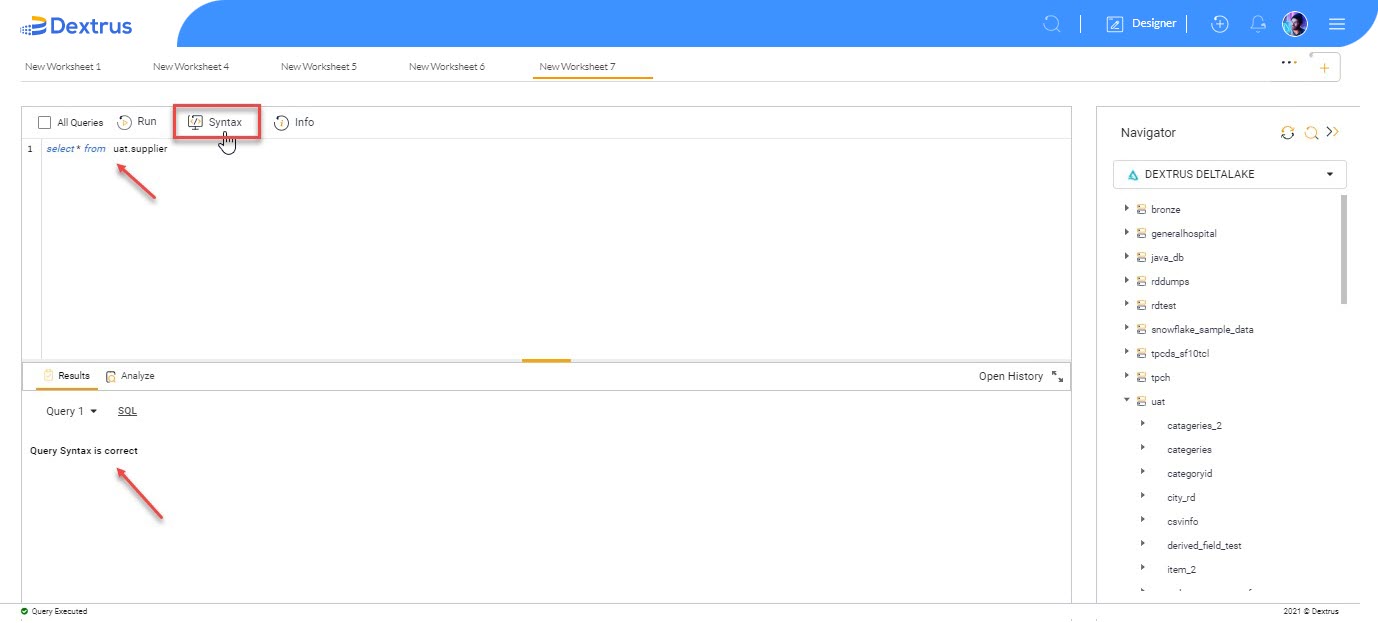
- Before running the SQL query, ensure the typed SQL query syntax is correct or not. To perform this action you can utilize the provided Syntax option.
- Click the
 Syntax icon button to verify the typed SQL query syntax declaration.
 - A message “Query Syntax is correct” is seen in the results section for the selected query of New Worksheet7.
- Click the
 Connection Info icon button to view connection information. A small pop-up window appears displaying connection details.

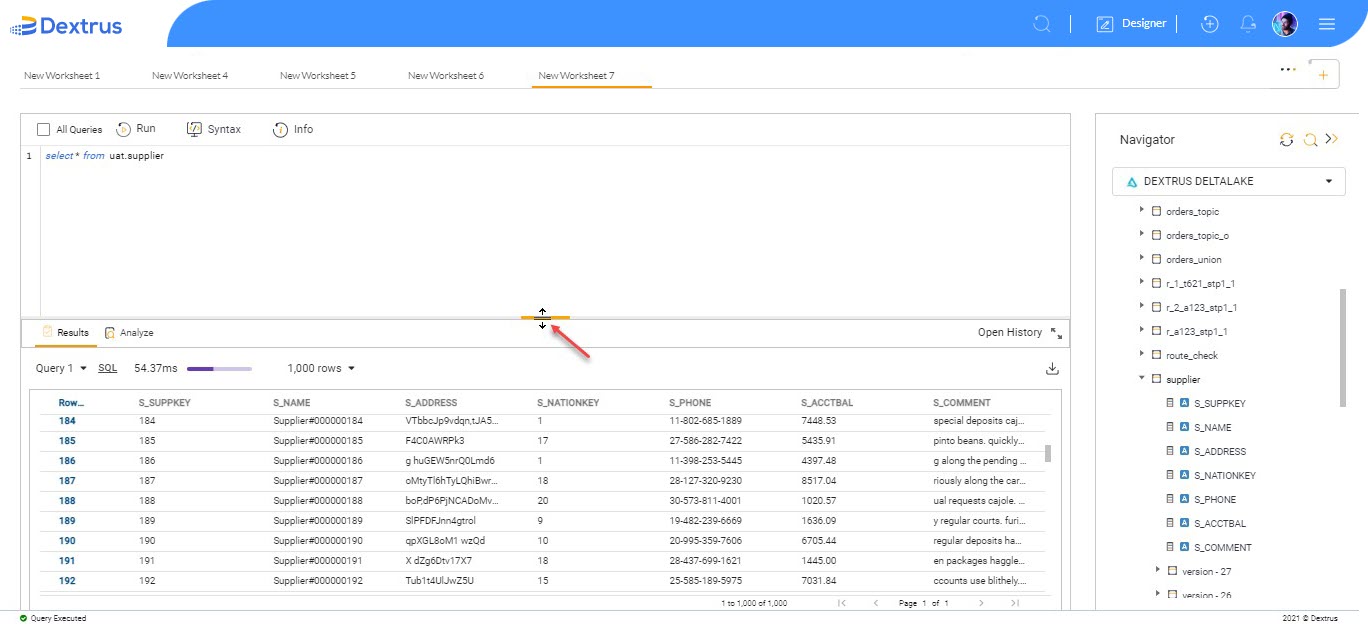
- Hover on the line separating New Worksheet and Results sections to view the
 icon. To adjust the results section as required hold left click on the touchpad/mouse and adjust the view vertically by moving your finger up/down direction on the touchpad/use the scroll bar on the mouse as required.
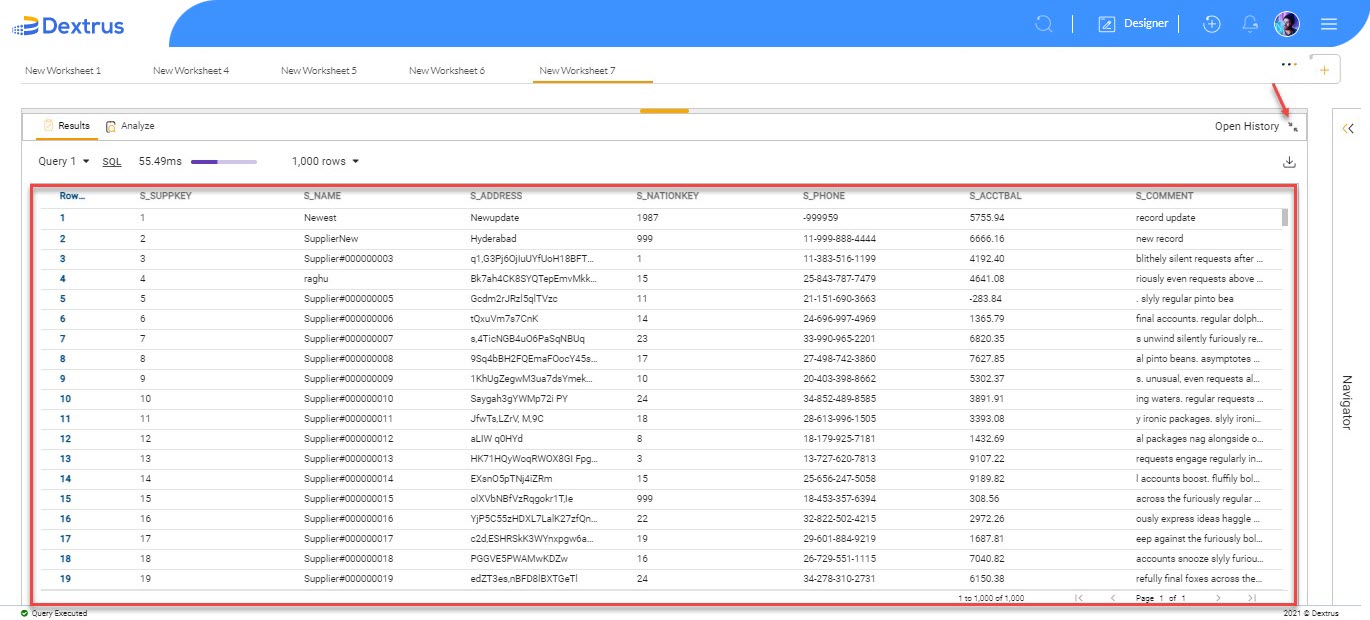
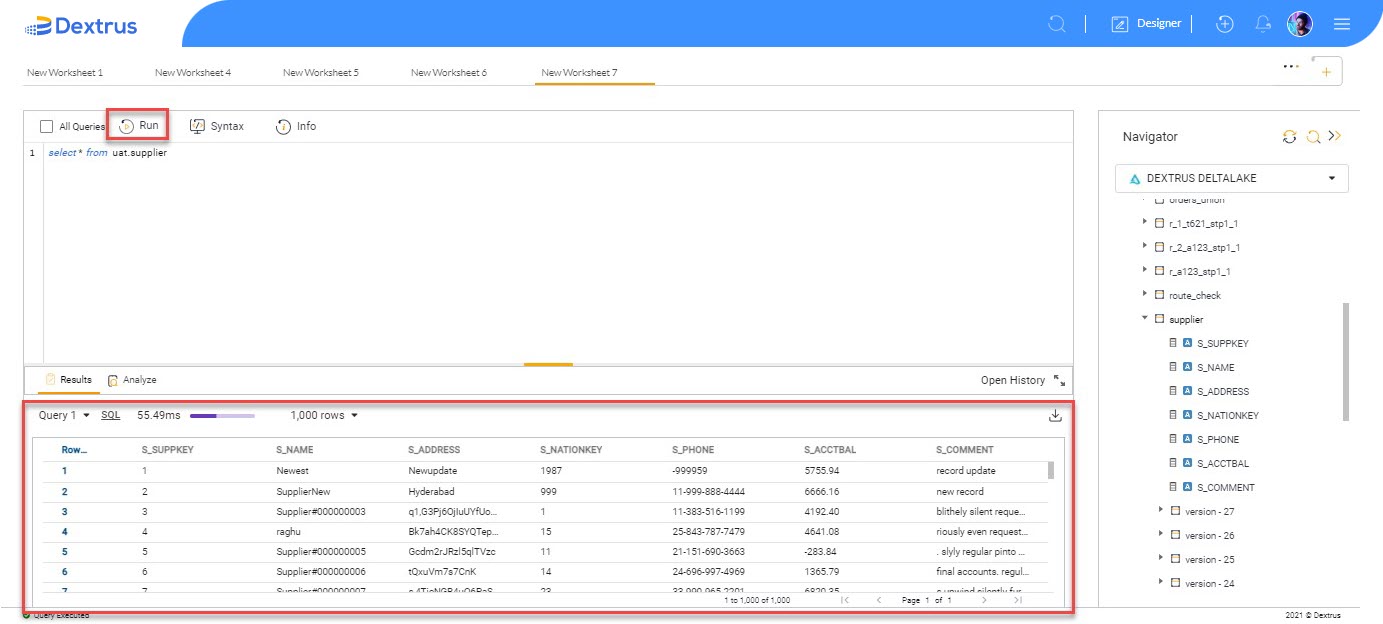
- Click the
 Run button icon to view the SQL query results.
 - The detailed results can be seen under the Results section, which is visible below the Worksheet section.
- Click the
 Download icon button to download the data in Excel/CSV file.
 - Once you choose any one of the download options (Excel/CSV) the file is downloaded to your local drive.

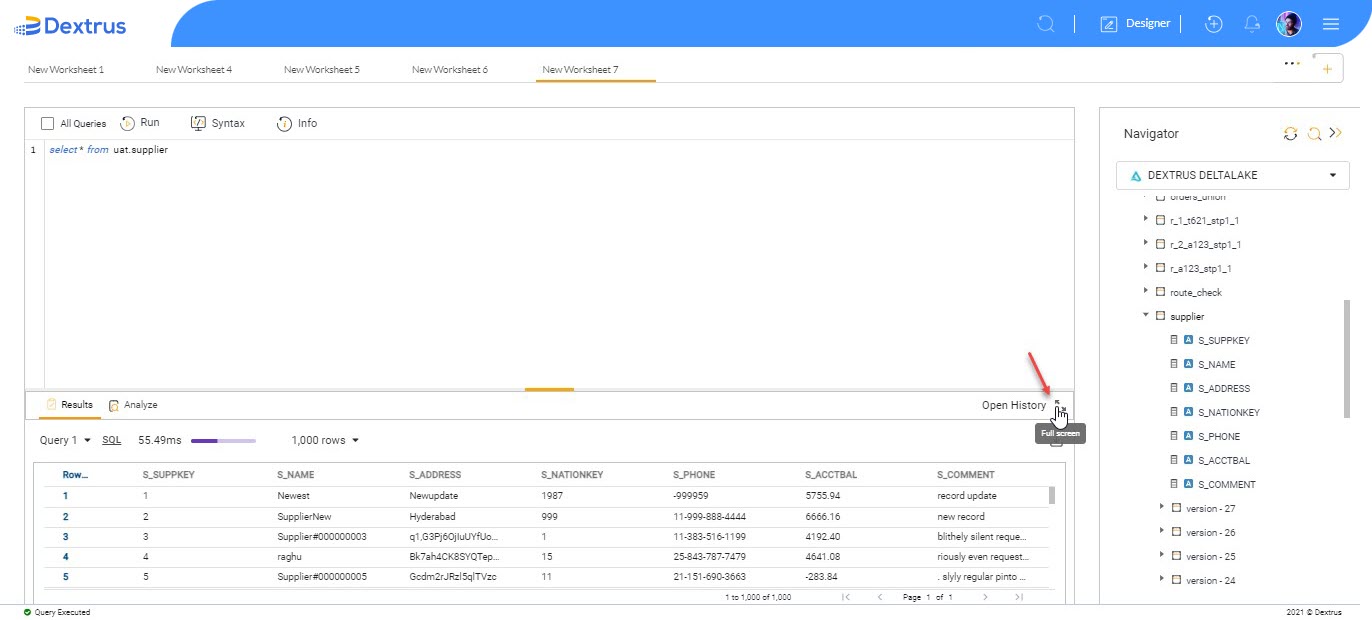
- Click the
 Full-Screen icon to view the results section in an enlarged view.
- Click the
 Default layout icon to switch back to the default layout view.