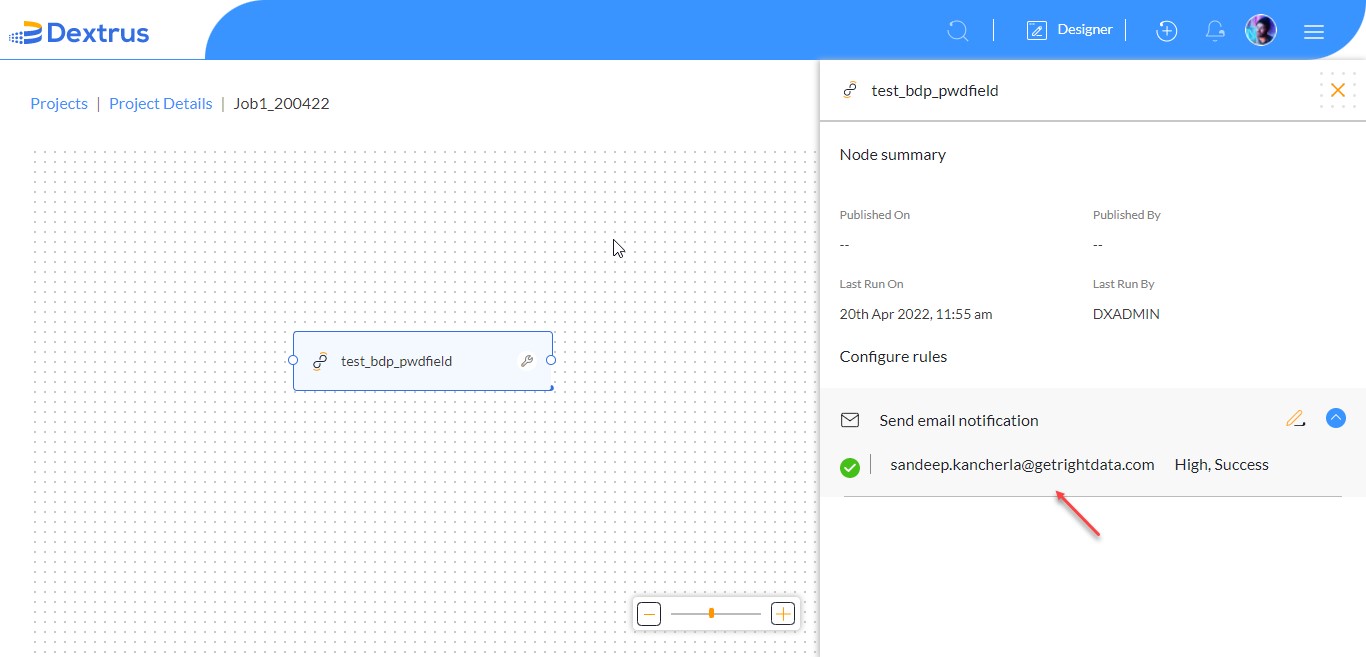
The Send email notification rule sends alerts and notifications through an email upon completion status of the job (Asset level). For each asset in a job an individual email is received by the recipient.
- For the selected asset, let us configure a Send email notification rule.
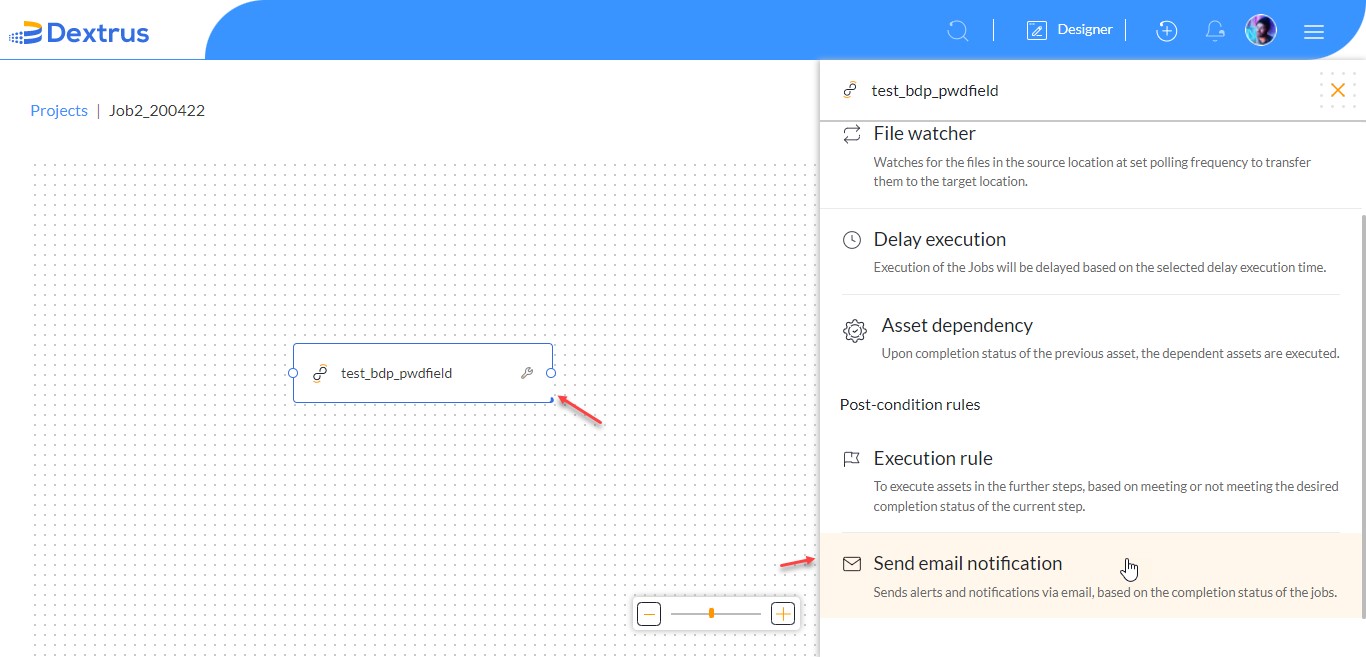
- Place the cursor on the asset and right-click on it to view various options ‘Add asset’, ‘Add rule’ and ‘Delete asset’.
- Click the Add rule.
- A Configure rules to the asset slide window appears from the right side of the page.
- Select the Send email notification rule.
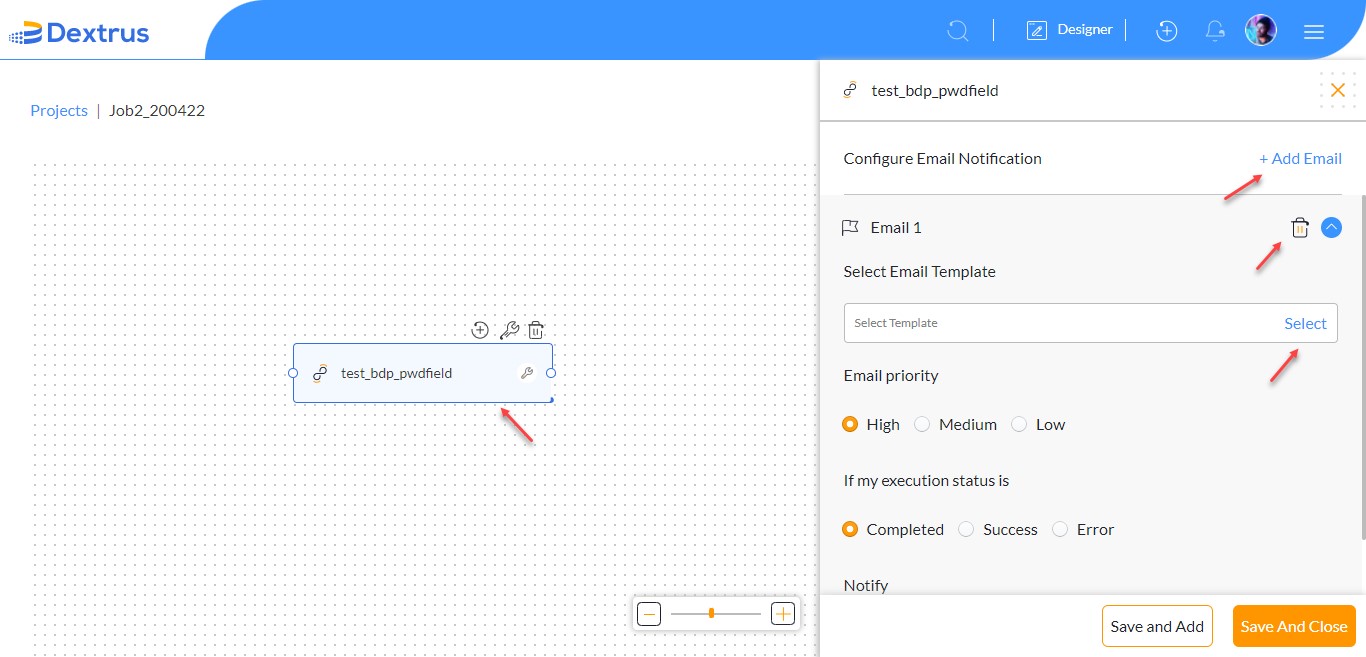
- By default, Email1 is displayed.
- Click the Add Email to add more than one email notification.
- Click the Delete icon to delete the Emails.
- Click the Select button, to select an Email Template.
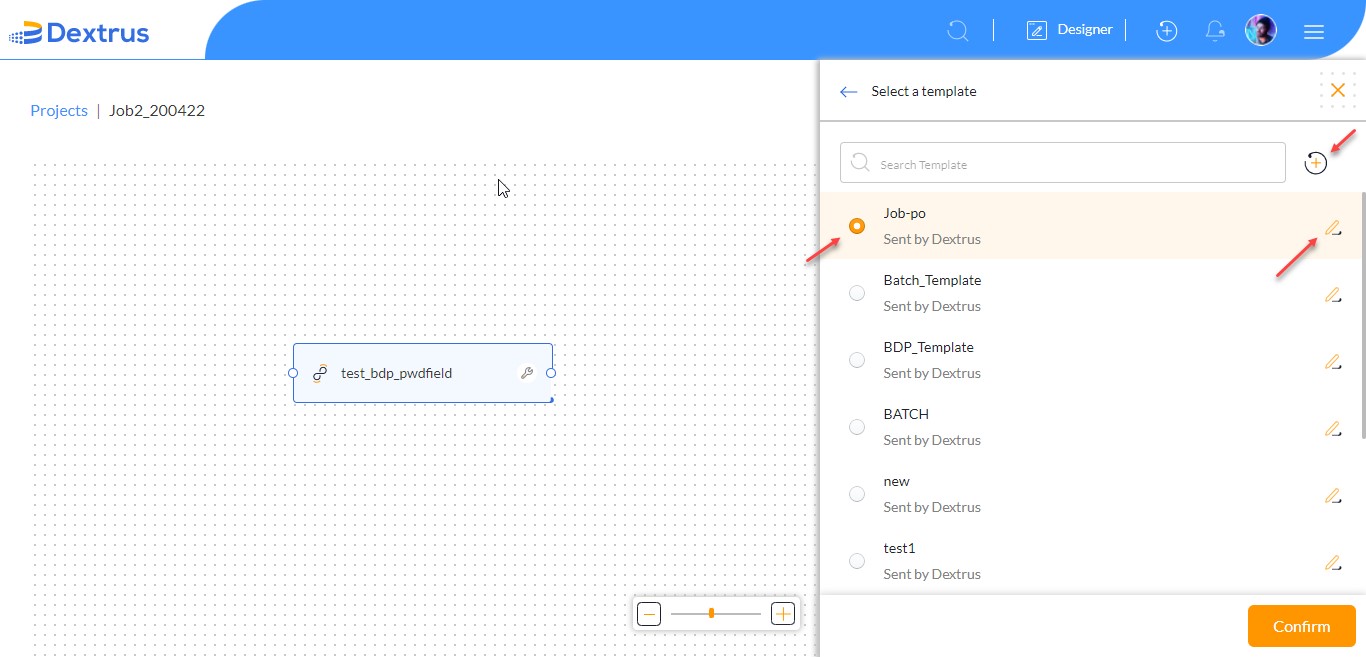
- Click the radio button against the required email template.
- Click the Edit icon against the required email template to edit it.
- Click the Plus icon beside the Search Template text field to add a new email template.
- The Add template consists of Subject, From, and Annotations.
- The Annotations drop-down list consists of a couple of annotations: JobName, JobStartTime, StartTime, EndTime, Duration, PipelineStatus, PipelineName, and RecordsProcessed.
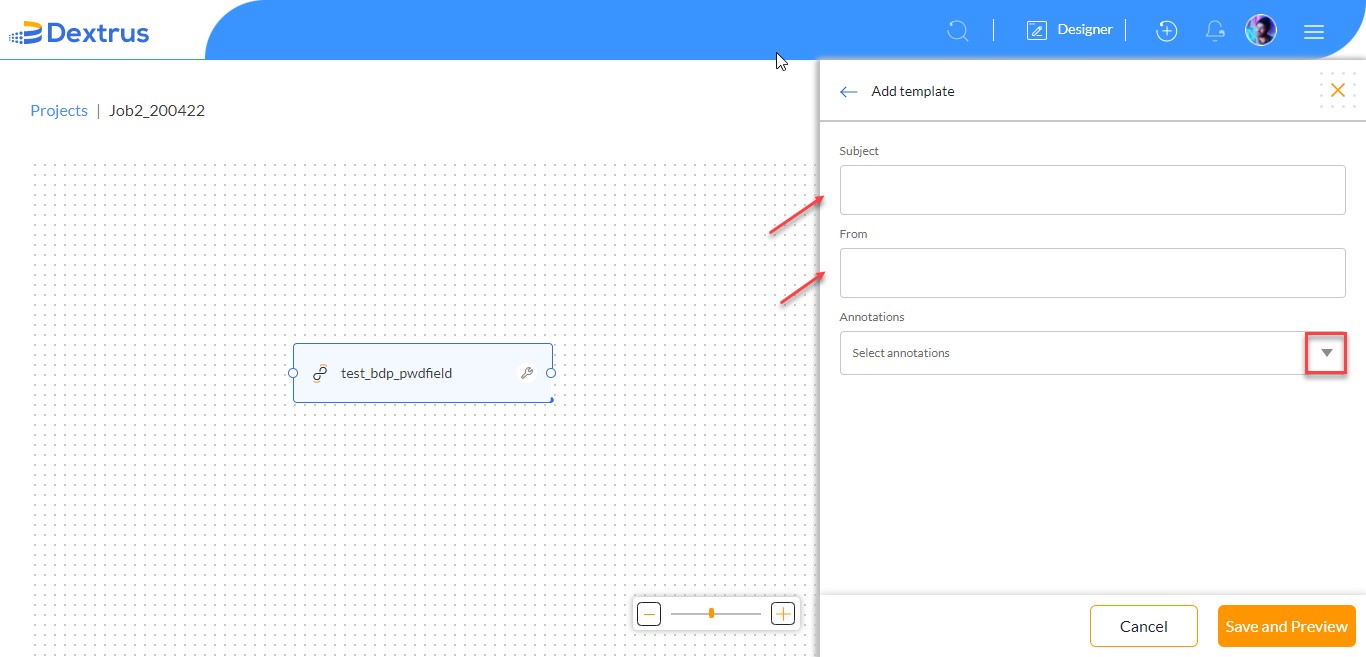
- Type the text in the ‘Subject’ text field.
- Type the required text in the ‘From’ text field.
- Select the required annotations from the Annotations drop-down list.
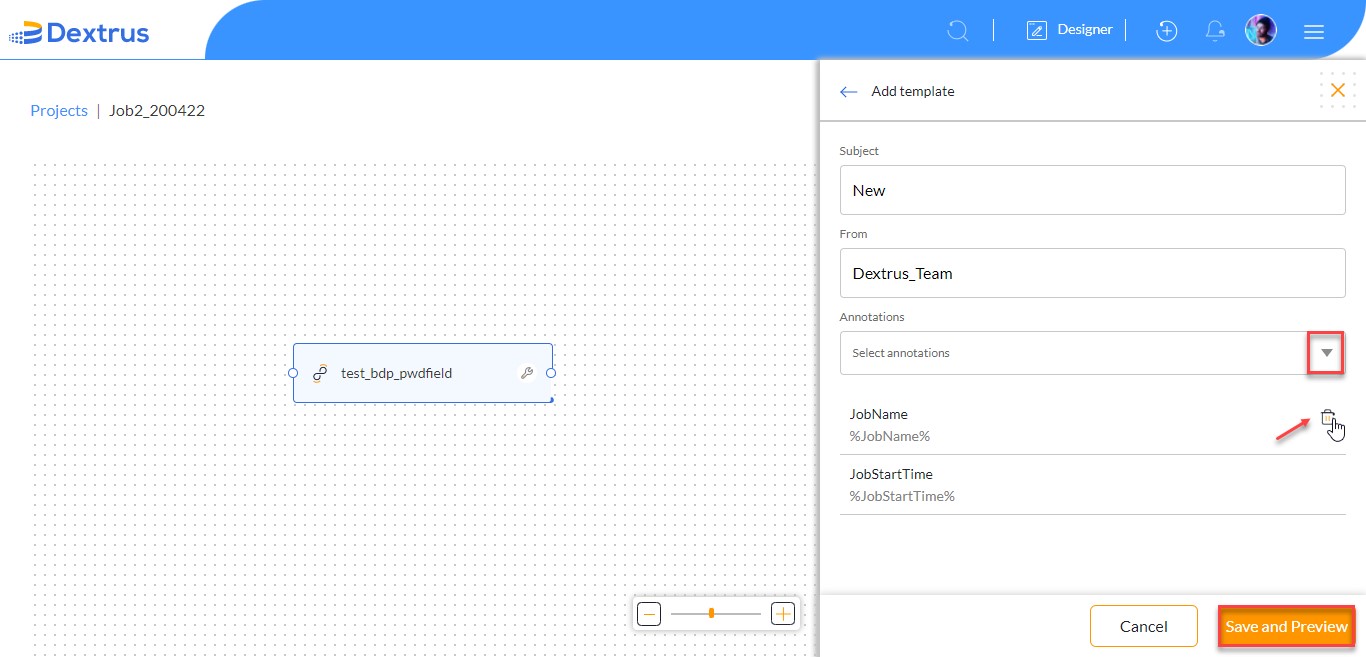
- The selected annotations are displayed below the Annotations drop-down list.
- Click the Delete icon against the displayed Annotation to delete it.
- Click the Save and Preview button to preview the created Email template.
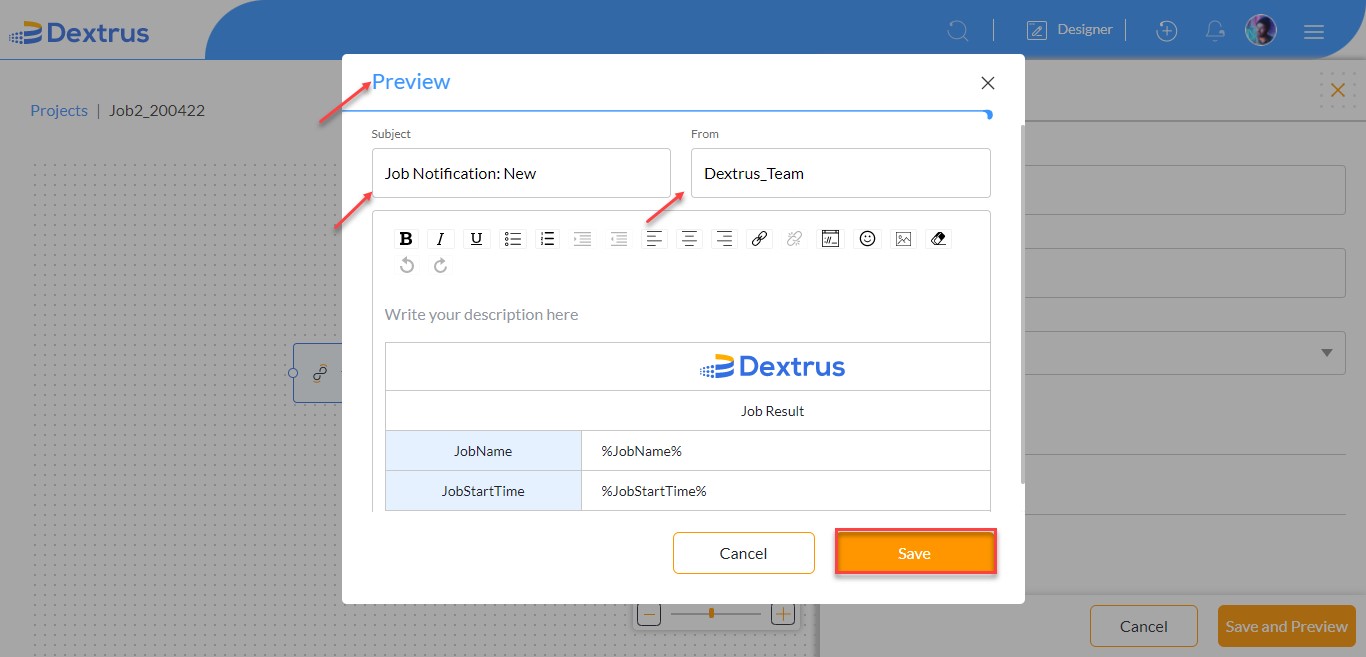
- The Preview pop-up window is displayed with selected Annotations and previously typed ‘Subject’ and ‘From’ text fields.
- For the created email template, a description can be entered in the ‘Write your description here’ text area.
Note: The Email body displays couple of Editorial options to type and edit text.
- Click the Save button to save this email template.
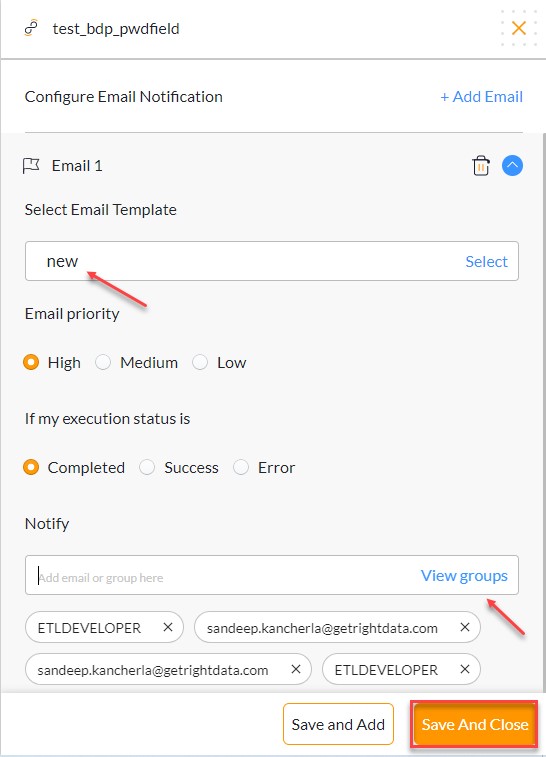
- The created email template ‘new’ gets updated in the Select a template list.
- Select the ‘new’ email template radio button.
- Click the Confirm button to apply the changes.

- Set the appropriate email notification configuration settings.
- To notify the users with the email notification, type an email id in the Add email or group here text field.
- Click the View groups text to add available groups for the email notification.
- Click the Save and Close button to confirm the selected email template.
Note: Selecting any group from View groups option doesn’t send email notification to the selected group. [This functionality will work in future build]
- As specified in this user guide for ‘Asset dependency’ and ‘Execute’ rules, you can schedule the job and receive email notifications to the specified recipients when the job is successfully executed.
- As per the job schedule the email notification is sent to the recipient with selected annotations.