The Union node merges incoming data from two or more source nodes. This node merges all incoming data obtained from all input sources based on the column names mapped.
The union node has two ports. One input port and one output port.
Note: Multiple data sources can be fed to the input port of the union node.
Input Port -> Data that needs to be merged is connected to the input port of the union node.
Output Port -> One output port is populated with merged data results. This resultant merged data is passed through the output port for further processing in the downstream nodes of the pipeline.
Configure the Union Node:
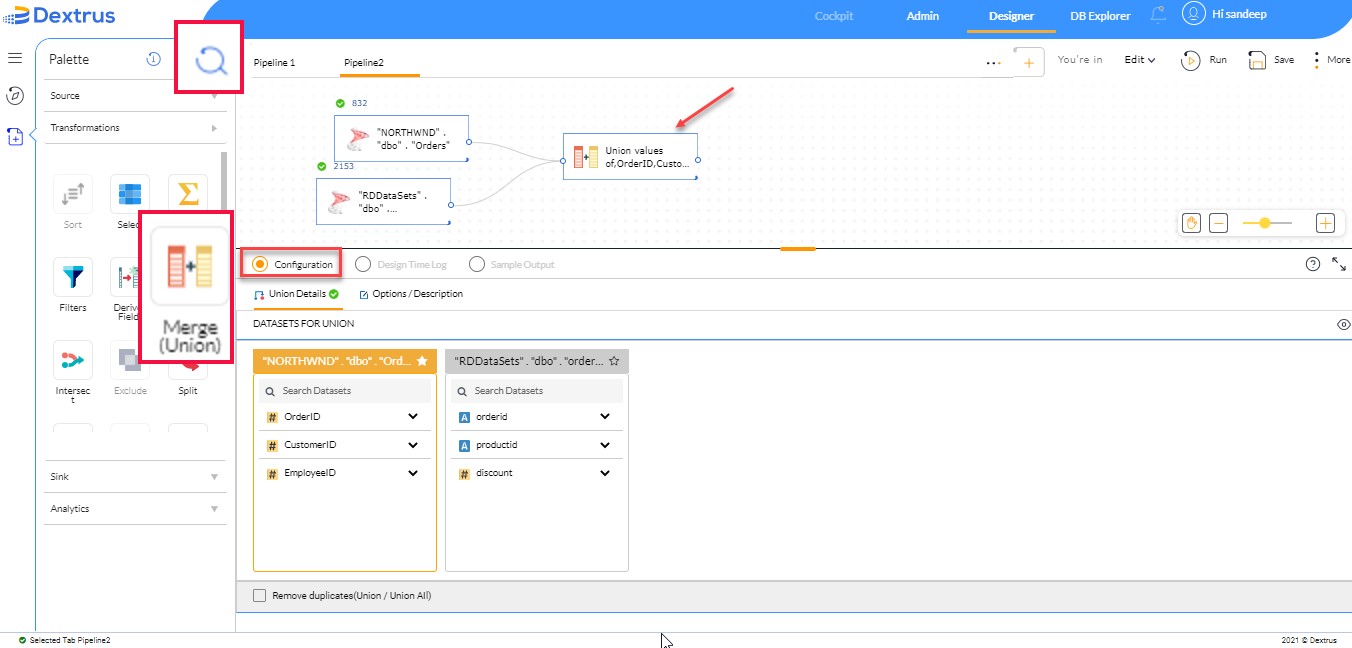
Union Node can be found in the Transformations Palette. The node can also be found through the search box next to Palette.
- Drag and drop the union node onto the canvas.
- The Configuration option (radio button) is enabled by default.
- The Configuration menu consists of Union Details and Options/Description.
- Union Details consists of DATASETS FOR UNION (Displays datasets of incoming source)
- Remove duplicates (Union / Union All) checkbox: Click the
 icon to enable the checkbox option to remove duplicates from the resultant merged data.
 - Preview icon: Click the
 to preview the output columns.
- Name: Displays the names of all output columns. (Column name cannot be changed here)
- Alias: Alias provisions to rename the column name and this can be done by double-tapping on the text field beside the column name.
- Remove duplicates (Union / Union All) checkbox: Click the
- Union Details consists of DATASETS FOR UNION (Displays datasets of incoming source)
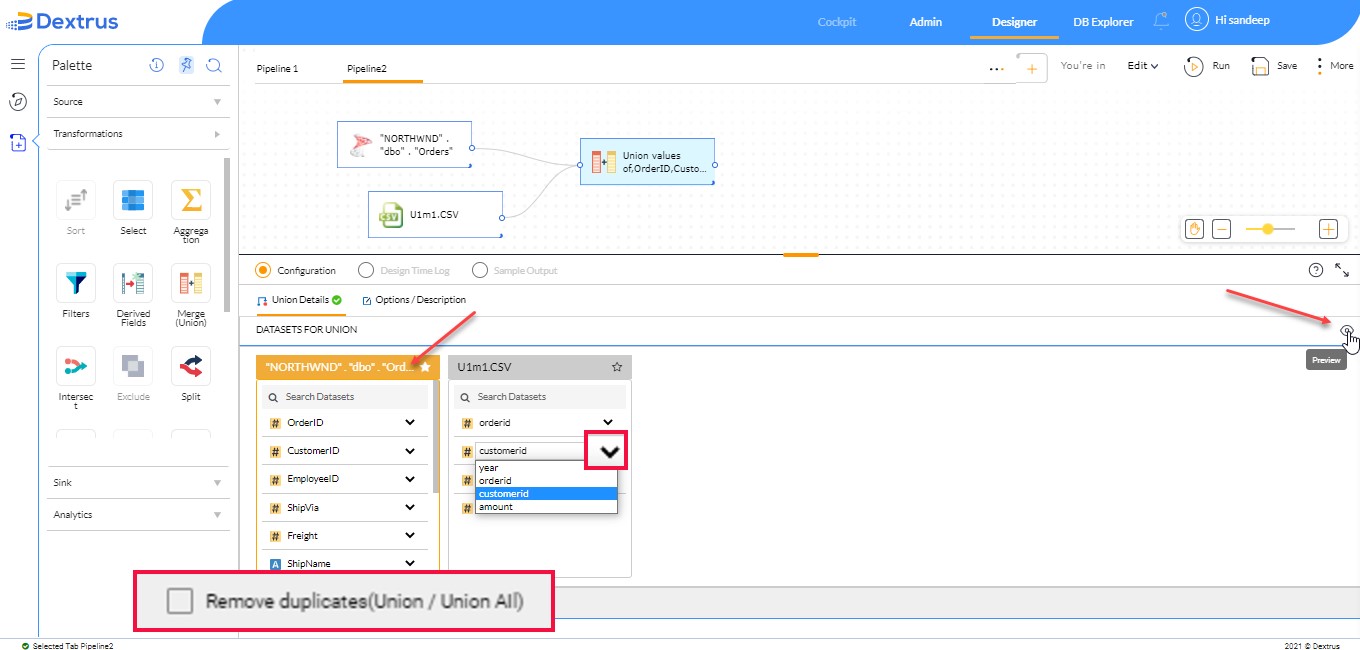
For example, let us consider an ORDERS table and CSV file as the incoming source nodes.
- Drag and drop the required ORDERS table and CSV file sources onto the canvas section.
- Double-tap on each source to configure.
- Drag and drop the Union node onto the canvas section.
- Create a pipeline connecting two source nodes (ORDERS table and CSV file) to the Union node.
- Once the pipeline is created, the connected source nodes tables are displayed under Union details.
- Click the
 icon to mark the table as the primary table to union with another source table.
Note: The primary table is highlighted with a light orange background color under the Union Details tab.
- Click the drop-down list of the other source table to select the column name that maps the primary table column names.
- Click the
 icon to remove duplicates from the resultant merged data.
 - Click the
 icon to preview the output columns.
- The OUTPUT COLUMNS pop-up window is displayed.
- Rename the column name (if required) using the Alias text field beside the name field.
- Click the
 icon to close the preview pop-up window.
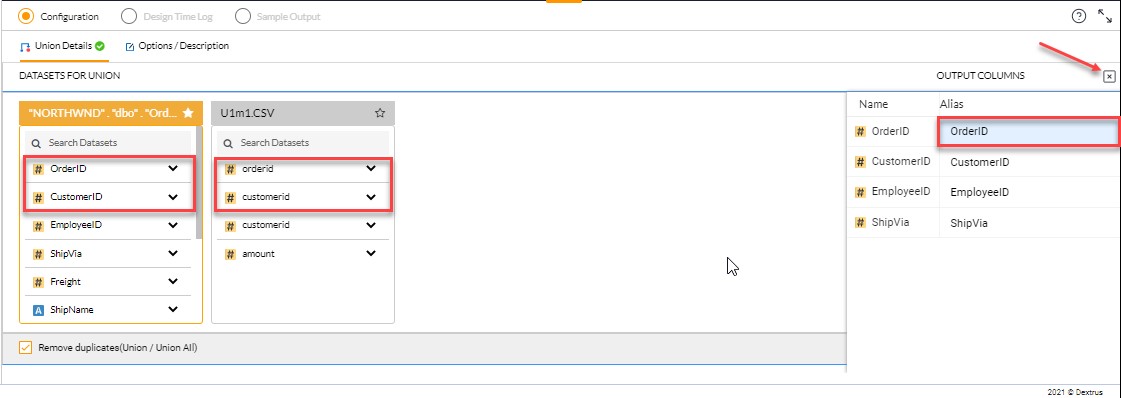
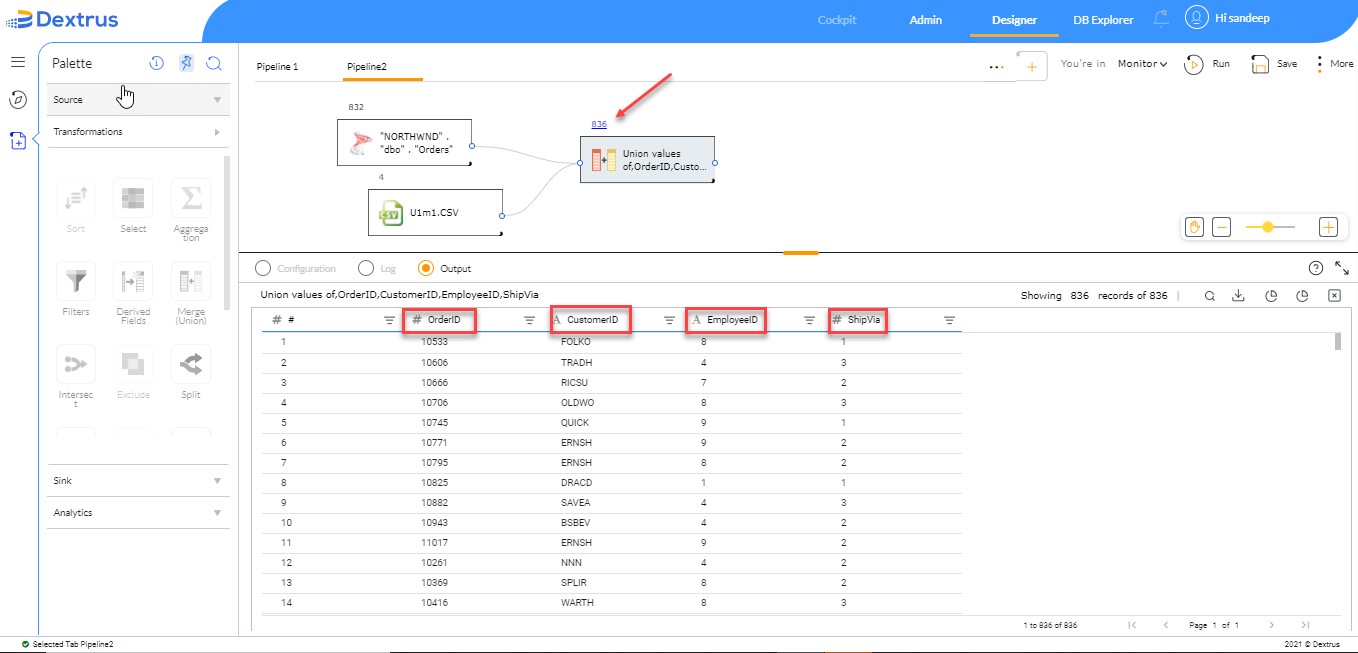
- Click the Run button to see the output.
- The output (records) seen contains merged data of two source nodes.
- The merged data contains all unique records since we have enabled the Remove duplicates checkbox in the previous step.
Note: Four column names are seen in the output since there is a minimum of four-column names on both tables (Primary and Secondary) as displayed under the Union details tab.
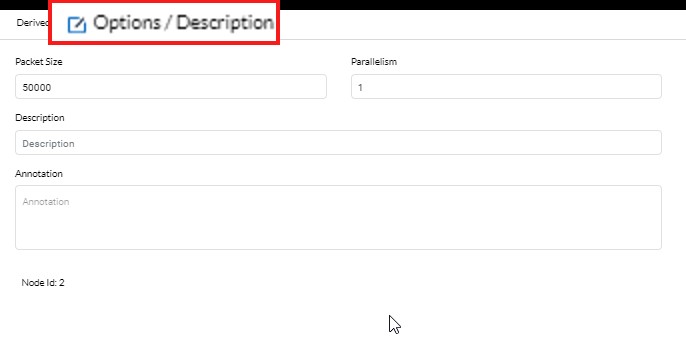
Options / Description:
- Packet Size and Parallelism can be maintained here to achieve better performance.
- Annotation can be used to mention brief details of the functionality achieved in the filter node.
- Description can be used to provide more details of the filter conditions and can also be used to maintain a log or audit trail of all the changes done to the filter conditions over some time.